What You Need to Make a DIY Ebb and Flow System:
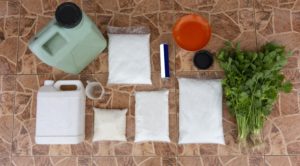
Before you get started, make sure you have all your supplies ready. The most important parts of this system are your reservoir, flood table (or tray) and a pump to transfer nutrient solution to your grow tray.
Here’s a list of supplies for your ebb and flow system:
- Container for flood tray
- Reservoir and fitted lid
- Tubing (verify tubing measurements with pump connections)
- Submersible pump
- Growing media
- Drill or saw
The Basic Setup
Start setting up your equipment, and place it close to where you ultimately want it. You can choose to elevate your grow tray, say on a table, while your reservoir sits on the ground. Just keep in mind that the distance (and elevation) between them decreases the water pressure coming from the pump.
Drill Fill and Drain Holes
Many growers prefer to have their nutrient solution enter the grow tray closer to the surface of the growing medium. This provides several advantages, not least of which is more even flooding that doesn’t disturb plants or kick up growing medium. You can choose to drill a hole where nutrient solution enters the tray. Or, you can go the easier route and simply lower the tube into the tray, and secure it with suction cups if needed.
This tube will eventually connect to the pump in your hydroponic reservoir. You still need to drill another hole for drainage, though. This is one you really can’t skip. Without proper drainage, plants won’t get enough oxygen. Not only that, you invite a host of infections, mold, and fungus, including root rot.
Make a hole big enough for your tubing on the end of your tray opposite from the fill tube. This needs to also be big enough to allow nutrient solution to drain quickly. Clean up any debris left from making the holes for your tubing.
Install Tubing
Before you fill your tray with growing medium, make sure you put your tubing in the grow tray. Check around the entry points of the tubing to ensure there aren’t any gaps or areas that might leak. You may need to use a caulk or silicone seal to make it watertight. Then, connect the ‘fill’ tube to the pump, with one end entering the grow tray, and the other to the nozzle on your pump. Don’t worry about turning the pump on our putting it into a reservoir yet. The ‘drain’ tube should have one end in the grow tray (where the nutrient solution drains out), and the other end should go back into the nutrient reservoir. Of course, if you plan on having a run to waste system (not recommended, but fine either way), you’ll put the other end in your disposal site.
Add Growing Medium
Now that the tubes are connected, you’re getting to the final steps. Add the growing medium of your choice, making sure to add enough for roots to grow, but not so much as to make flooding difficult. There are many different types of grow media that work in ebb and flow systems, so make sure you read our guide on the best growing mediums for hydroponics.
While most growing media does work for this type of hydroponic system some can cause problems. If you’re using a lightweight medium, like perlite, make sure to mix it with another medium, like clay pebbles. This keeps the balance of moisture and aeration, while also preventing the lighter medium from floating and clogging the system.
Add Nutrient Solution
Now it’s time to add nutrient solution to your reservoir. Make sure you follow the instructions exactly- a little more or less than needed, and you can cause problems for your plants. Once you fill your reservoir, place the submersible pump at the bottom. Check to make sure all the tubes are secure before you go any farther.
Figure Out Your Flood Cycles
This part requires the most experimentation. You need your nutrient solution to flood your grow tray without spilling over. However, you also need to make sure it drains quickly enough to avoid ‘drowning’ your plants. Yes, once you figure out your timing you can set up a timer to do the work for you. That said, if you don’t set your intervals correctly, a timer doesn’t help as much.
The best way to figure out your flood and drain cycles is simply by timing it out yourself, from flooding to draining. You’ll also have to keep an eye on how long it takes your growing medium to dry out. We’ll go over how to do this briefly here, but if you need a more detailed guide, make sure to read Timing Ebb and Flow Cycles.
Here’s a quick rundown on timing for your DIY ebb and flow system:
Get a timer and a notepad ready. You’ll need to record how long it takes for each step of this process.
First, power on your pump. It should push water into the grow tray steadily, but not so quick as to pick up plants. Time how long it takes for the nutrient solution to reach ¾ or 70-80% of your grow tray’s capacity. Then, power off the pump and record the time.
Next, start timing how long it takes for the nutrient solution to completely drain from the tray. Write down the drain time. It’s okay if there’s a small film of nutrient solution, but there shouldn’t be ‘standing’ water.
Don’t flood again until you can see that the growing medium is more or less dry. Some types of growing medium dry very quickly (like clay pebbles), while others retain moisture for much longer (like vermiculite). Make sure you note how long it takes. This will be the period of ‘down time’ between feeding (aka flooding) intervals.
Now you have a basic idea of how long to allow the pump to run for (your first recording of the ‘fill’ time). You also know how long it takes to drain. If it takes significantly longer to drain that it does to fill, consider creating a larger hole for the drain.
Next, all you have to do is set your timer to power the pump on based on your intervals. Of course, it isn’t always this simple. Often, you end up needing to experiment with different times and intervals. Don’t worry, that’s completely normal. Over time, you can see what works for your plants and get the optimal feeding schedule.
Related: What you need to know about hydroponic pumps


