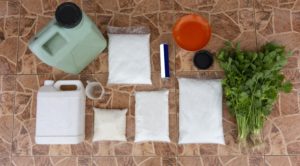
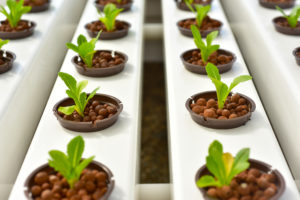
Not every homemade nutrient solution needs chemicals and minerals. You can make your own natural nutrient solution at home, with things you already have around the house. Now, this nutrient recipe isn’t as specific as others. You won’t need to measure out chelated iron, potassium nitrate, or any other minerals. This natural nutrient solution is more of a compost brew.
Using Organic Nutrient Solution
When you make your own organic nutrient solution, you have a little less control over how much of each nutrient your plant gets. However, the nice thing is that you don’t have to worry about storing chemicals or creating waste. In fact, with this recipe, you’ll be reducing waste by using it.
How does it work?
Essentially, you’re making compost, which you then steep in clean water to dissolve the good nutrients within.
Keep in mind that although you’re creating an organic nutrient solution, and using natural means to do so, you still need to test it out. Don’t put any nutrient solution into your hydroponic system unless you’ve already tested the pH, EC, and made any necessary adjustments.
Some compost tea recipes are said to reduce instances of fungal disease and root rot. However, like anything else you add from the outside into your hydroponic system, you need to be careful of bringing pests or pathogens in. For that reason, compost nutrient solutions are even more suited to outdoor hydroponic systems.
Related: What is compost?
Compost is essentially decomposed organic matter. Nearly any natural material can be used for composting. When gardeners make their own compost, they typically use a special bin or create a compost heap outside. After several weeks, the compost is fully decomposed. The result is a natural fertilizer full of nutrients and helpful microorganisms.
Common compost materials include:
- Leaves
- Cardboard
- Paper products (without plastic linings)
- Grass clippings
- Discarded fruits and vegetables
- Sticks and twigs
- Pruned flowers or stems
- Egg shells
- Straw
- Used coffee grounds and tea
- Cotton scraps
- Coffee filters and napkins
- Cut or shredded burlap
- Wilted flowers
- Ashes
- Newspaper
- Chopped cork
- Stale pet food
As long as it’s a natural material that decomposes, you can use nearly anything to make your compost.
On the other hand, there are things that are definitely better to avoid, even if they do decompose.
What to avoid composting:
- Dairy products (cheese, milk, yogurt, etc)
- Meat products
- Plastics
- Metals
- Ceramics
- Anything that has chemicals, or won’t decompose
Making a balanced compost
As you now know, you can use just about anything natural in your compost. However, there’s one key to success, and getting faster compost: balance.
One of the easiest ways to ensure you end up with balanced nutrients in your compost is evenly mixing green and brown matter. Green matter includes things like grass clippings, vegetable peels, and pruned material. Brown matter includes things like cardboard, paper, and dry sticks.
It’s not just about color, however. You should also try to keep the ‘wet’ and ‘dry’ items in your compost balanced. This helps each type of material decompose faster.
How to Make Organic Nutrient Solution
Ready to get started? Here’s a quick, easy way to make your own natural nutrient solution.
1. Get your compost ready
Now that you know how to make compost, it’s time to start. Whether you choose the pile or bin method, we do recommend keeping it outdoors. Compost is great, but the decomposing process can get somewhat aromatic. Preparing your compost will take the longest of any part of this recipe. Thankfully, once you have your compost heap, you can keep using it and adding to it.
It can take several weeks, or even much longer depending on how much material you’re composting, and which materials you use. Compost piles generally take around three months to be ready at least, although some can take as little as four weeks. Other, large piles can take a year or more.
Create your compost heap, and let it sit for a while. Just make sure you use a shovel and turn it over every two to three weeks. Once it’s ready, it should resemble dark soil.
2. Start the ‘tea’
Many growers refer to this natural nutrient solution as compost tea, because you let your material soak in water like you would steep tea. Depending on the size of your hydroponic system, use either a five or ten gallon bucket to mix your nutrients. Fill your bucket with fresh, pure water.
If you use a 5 gallon bucket, add 2 shovels of compost. Use up to 4 shovels of compost for a 10 gallon bucket.
3. Let the compost soak
The next thing you need to do? Wait. Don’t worry, you won’t be waiting as long as you did for the compost to finish. Let it soak for a minimum of two days. Three days is ideal, although you can let it ‘steep’ for a couple days longer if needed.
4. Strain the compost
Now, there are plenty of nutrients dissolved in the water. The only problem is that the compost material is still in there too. Use a strainer, fine mesh, or loose knit cloth to separate the solution from the compost debris. It’s easiest to cover your bucket with your straining material, and empty the nutrient rich water into a slightly larger container.
5. Discard excess debris
Before you go any further, take the used compost debris out of your work area. Don’t worry, you don’t need to throw it away. Just put it back into your compost pile and let it continue its natural process. Make sure you remove as much of the debris as possible to keep your grow area clean, and to avoid clogging your hydroponic system.
6. Dilute your solution
Even though this is a natural nutrient solution, it’s still very concentrated. To avoid giving your plants harmful levels of nutrients, you should only use a portion of your solution. If your system runs 100 gallons of water, you only need to add a single gallon of your nutrient solution. For 50 gallon systems, use half a gallon of solution. For even smaller systems, such as a 25 gallon system, you only need a quart of the solution.
7. Double check your work
Whether you make your own nutrient solution, or you buy premixed nutrients, you should always test before you add anything to your system. Check your nutrient concentration (EC) levels, and your pH (acidity or alkalinity). If either are outside of your target range, dilute your solution, and add pH up or pH down as needed. Then, test your solution again. You may need to test a few times before you hit your perfect range, but you’ll also avoid hurting your plants.
8. Add nutrients to your reservoir
Because you have to dilute this solution, you can add the necessary amount directly to your hydroponic reservoir. Just make sure your reservoir is full of clean, purified water, and that it’s also in your target pH and EC ranges.
Use Alone, or With a Supplement
This natural, homemade nutrient solution is full of essential elements for plants in any growth stage. As long as you keep your EC levels in your plants’ ideal range, you can use it as a cheap, standalone nutrient solution. However, there’s nothing wrong with adding small amounts of supplemental nutrients if your plants show signs of deficiency. One thing to note is that if your plants seem low on calcium, you can naturally add that too. Just add more crushed up eggshells to your compost to increase calcium content.


