General Supplies
Before we get started on the elements of nutrient solution itself, you need to get some equipment together. No matter what formula of nutrient solution you’re making, you need to be precise and prepared. Nobody wants to get elbows deep in a project only to have to make a store run.
Before you start mixing, make sure you get these general supplies.
What you need:
- Large bucket or reservoir for mixing
- Clean, spacious working area
- Gloves, mask, eye protection
- Digital scale (accurate to .01 at least)
- Measuring cups
- Mixing bowl
- Empty, clean gallon jugs
- Mixing tool (whisks are optional)
- Purified water (ideally, Reverse Osmosis purified)
- Extra cloths or paper towel for cleaning accidents
Supplies for Nutrient Solution
Now we can get to the really interesting part. These are the supplies you need to create soluble nutrients. You’ll combine these in specific amounts to create a balanced formula for your seedlings.
What you need:
- Calcium nitrate (carbonate if nitrate is unavailable)
- Magnesium sulfate (carbonate if nitrate is unavailable)
- Ammonium phosphate
- Potassium nitrate (sometimes labeled as potash)
- Boric acid
- Manganese chloride
- Chelated iron
- pH adjuster (pH up and pH down)
Nutrient Measurements
Now you know what kinds of nutrients you need. The next step is figuring out how much you need of each. As we mentioned earlier, this is a diluted nutrient solution, because very young plants really don’t need as much. Not only that, they’re much more susceptible to nutrient burn. This hydroponic nutrient recipe will look a lot like some of those we have for older plants, but we’re just not using as much of each element. We recommend these measurements as a maximum- you can always use less as long as you keep your proportions the same.
Basic nutrient measurements:
- 2 tsp of potassium nitrate
- 1 tsp of ammonium phosphate
- 2 tsp of magnesium sulfate
- 2.25 tsp calcium nitrate
- ⅛ tsp boric acid
- .05 tsp manganese chloride
- .25 tsp chelated iron
- 10 gallons pure water (preferably reverse osmosis)
Note: don’t mix these all together yet. We’ll be mixing macronutrients and micronutrients separately to ensure that the solution is properly saturated.
How to Mix Your Nutrients for Seedlings
As you’ve certainly noticed on our ingredients list, you need pure, clean water to start your mix off right. We recommend reverse osmosis water simply because it gives you the best chance of starting your nutrient solution off without added minerals. Not only that, you also don’t have to worry about having a high or low pH as much.
Get all your supplies ready ahead of time. Keep in mind you may need more than one bucket, and you may even need several depending on their capacity. Set your chelated iron, manganese chloride, and boric acid aside. These supply the micronutrients, and we’ll be mixing them last.
Set out your macronutrients and salts (i.e. the calcium nitrate, magnesium sulfate, potassium nitrate, and ammonium phosphate). Add each of these one at a time. Don’t be tempted to skip steps and add them all at once. It’s harder to create a uniform solution, and the salts may not dissolve properly otherwise.
Note: It’s much better to ‘over stir’ in this part, rather than under stir. Some growers prefer stirring by hand, and then sealing their bucket and giving it a good shake, just to be sure everything’s mixed properly.
Now, we’ll move onto the micronutrients (i.e. the boric acid, chelated iron, and manganese chloride). Instead of mixing these in the larger bucket, you need two smaller containers that can hold about a quart of water (or ideally, a bit more).
Keep in mind we won’t use the entire mixture, but we need a larger volume to get the dilution we need.
First, we’ll start with the boric acid and manganese chloride. Measure these both out, and mix them into a quart of pure water. Like with the macronutrients, you need to make sure you mix them thoroughly.
In your next quart of water, add the chelated iron. Like with every other nutrient in this recipe, you need to make sure you thoroughly dissolve it into the water.
In both cases, we’ll be adding less than half a cup of the micronutrient mixtures to our bigger macronutrient bucket. For the chelated iron solution, measure a little less than ¾ cup and put it into the 10 gallon macronutrient solution. Next, measure out ½ cup of the manganese chloride and boric acid mixture. Add it to your 10 gallon bucket. Mix in your micronutrients to ensure you have a uniform solution.
You’re almost done, but you still need to check your work before you give your DIY nutrient solution to your seedlings.
Check Your Levels
If you’re an experienced hydroponic grower, you know how important testing your EC and pH levels are. pH lets you see how acid or alkaline your solution is, while EC shows you how concentrated the nutrient salts in your solution are.
How to check water in your hydroponic system
Like any other aspect of your system, the ideal levels vary from plant to plant. However, we’ll use some generic target levels for this example. Most plants like a pH between 5.5 and 6.5, but that isn’t always the case. Make sure that whenever you adjust your pH you keep in mind your plants’ requirements. If your pH is too high or low, you’ll need to use a commercial pH Up or pH Down product. If you do need to adjust your levels, go slowly, and test after you add any products.
You’ll go through the same process, more or less, for your EC levels. With seedlings, it’s much better to go with a lower EC, rather than a higher one. Aim for an EC level under 1.0. If your solution is stronger, gradually add water until it’s low enough for your plants to tolerate. You can always add more nutrients later as your plants start maturing.
Add the Solution to Your System
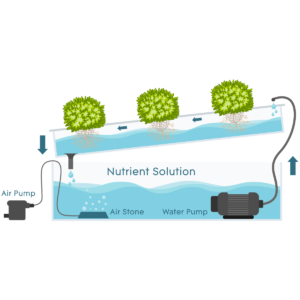
You’ve carefully measured, mixed, and tested your DIY hydroponic nutrient solution for your seedlings. What’s next? Adding it to your system of course! If your system’s already set up, this step is literally as simple as pouring your nutrient solution into your reservoir, and powering on your pump (unless you’re using a passive system, like DWC).
Just remember, you need to check your levels consistently, especially at this early stage in your plants’ growth. As your plants take in more water, the nutrients become more saturated, which inevitably raises your EC levels. Not just that, but this uptake (and evaporation) affects your pH levels.
Keep in mind you can’t use this nutrient formula forever (well, technically you can but your plants won’t grow as well). When your plants get to the next stage of maturity, you need a special nutrient formula to fuel their vegetative growth.
